Encrypt USB-stick on Ubuntu in three steps

1. Install the required package:

sudo apt-get install cryptsetup

2. Create a partition on the USB-stick:

sudo cfdisk /dev/sdX

3. Encrypt the partition:

sudo luksformat -t ext2 /dev/sdX
Creating encrypted device on /dev/sdX...
Are you sure? (Type uppercase yes): YES
Enter LUKS passphrase:

Entering the USB-stick into Ubuntu will bring up the following window:
unlockencryptedusbstick

To edit the label of the USB-stick (by default it’s just ‘disk’) use e2label for ext filesystems and mtools for fat filesystems.

Vnstat – Network Traffic Monitoring Tool

vnstat is another app that can be used to monitor bandwidth usage. It is a little simpler and easier to use then the ipac-ng package. One of the benefits of vnstat is it’s not a running daemon so it takes up no memory. The process is created via a cron job which is run every 5 minutes.

Install

The vnstat package is very easy to install from the repositories with no dependencies.

sudo apt-get install vnstat

Setup

vnstat is meant to be used by any user so it needs to be set up that way first by giving correct permission. The following gives any user permission to use this feature. If desired you can set up a group so only users in the group can use this.

sudo chmod o+x /usr/bin/vnstat

sudo chmod o+wx /var/lib/vnstat/

Now vnstat should be ready to run

Usage

To create the cron job simply run this command

vnstat -u -i ath0

Replace ath0 with the interface you want to monitor

This creates a file in /var/lib/vnstat/ that collects the data for that interface. A cron job will run every 5 minutes to update the data. Below is a sample output with no options.

Database updated: Thu Jan 12 22:20:01 2006

        ath0

           received:           0.11 MB (nan%)
        transmitted:           0.01 MB (nan%)
              total:           0.12 MB

                        rx     |     tx     |  total
        -----------------------+------------+-----------
            today      0.11 MB |    0.01 MB |    0.12 MB
        -----------------------+------------+-----------
        estimated         0 MB |       0 MB |       0 MB

You can read more about options you can use to modify the output in the man page of vnstat.

Set up Gmail in Evolution, Gnome’s Mail Client and Organizer

In Gmail POP can be enabled , and here is how to set it up for Evolution.

  • Login to your gmail account and select Forwarding and POP.

Enable pop and set pop up in the way you prefer. (At least make sure pop is enabled.)

  • Open evolution:

Select Edit > Preferences > Mail Accounts
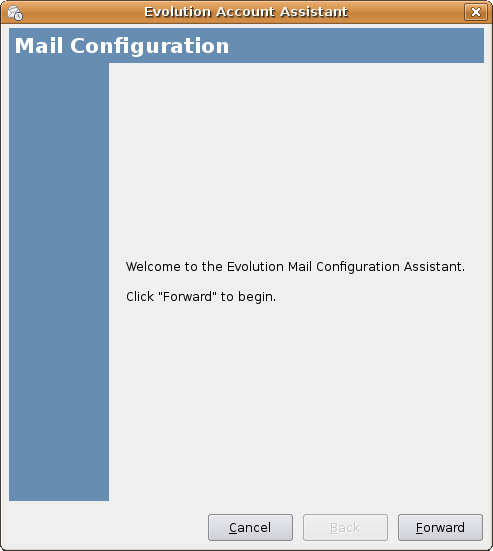
Select the Add Button > (Evolution Assistant Account starts.

screenshot-evolution-account-assistant.png

If you use evolution for the first time this is where you begin.

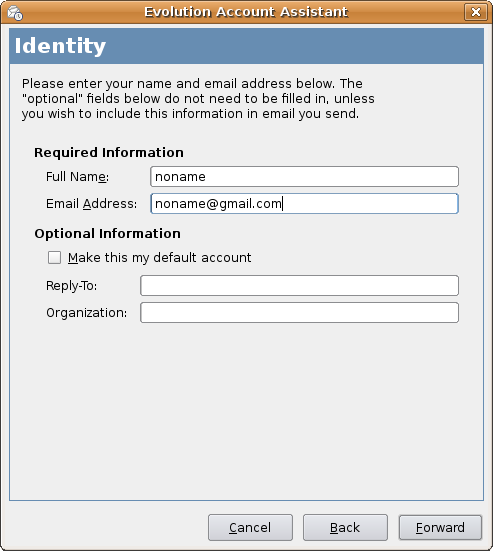
  • Identity

Evolution Account assistant Identity

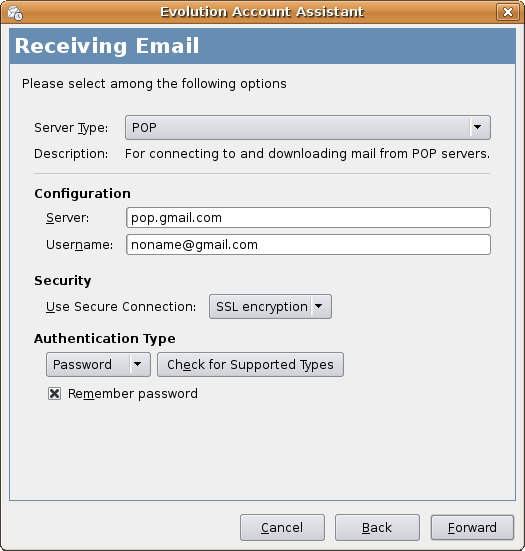
  • Receiving email:

Evolution Account Receiving Email
Server type: POP
Server: pop.gmail.com
Username: username@gmail.com
Security > Drop-down menu > select SSL connection
Authenthication Type: password
Flag remember password if you wish
Select ok

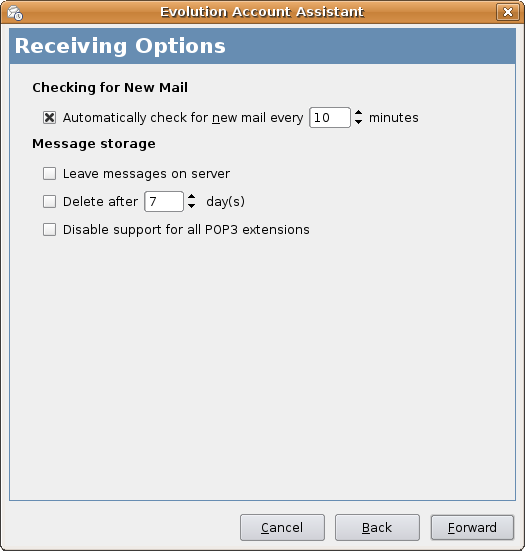
  • Receiving Options

Evolution Account Assistant Receiving Options

Are all optional, fill in as you please.
Select Forward

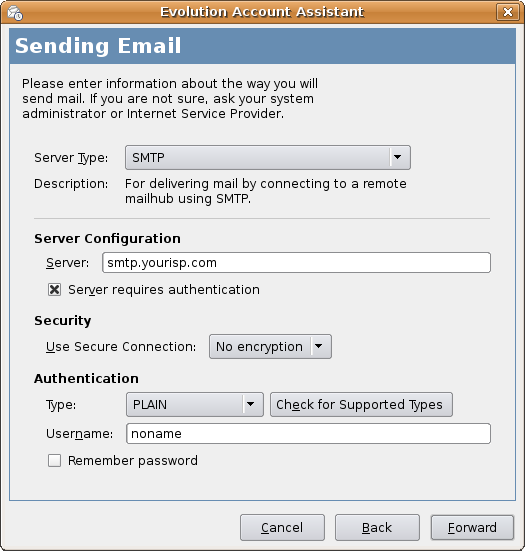
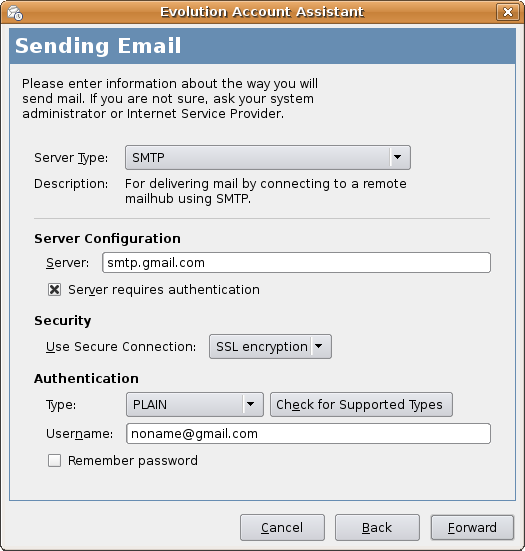
  • Sending Email:

Can be done in 2 ways:

  • 1, Fill it in using The SMTP server information provided by your ISP, I think this is the best way, the send mail gets no advertising added.

screenshot-evolution-account-assistant Sending Email with your  ISP's SMTP server

  • 2, Use the SMTP server provided by Gmail:

screenshot-evolution-account-Use SMTP provided By GmailServertype: SMTP
Server: smtp.gmail.com
Flag: server requires authentication
Use Secure Connection: SSL
Fill in Username: username@ gmail.com
Select OK
Done.

Now restart Evolution and see if it all works.

For more instructions (if needed) go to Gmail help Center